Creating Your First Story
A Storyfall story is a branching interactive fiction game made of scenes (pages of text), choices (links between scenes), variables (story memory), and conditions (rules about when content appears). This guide walks you through creating, previewing, and publishing your first one.
Video Tutorial
Step 1: Access Your Workshop
Click on the Writer’s Workshop in the menu.
Step 2: Create a New Story
- Click the “Create Story” button.
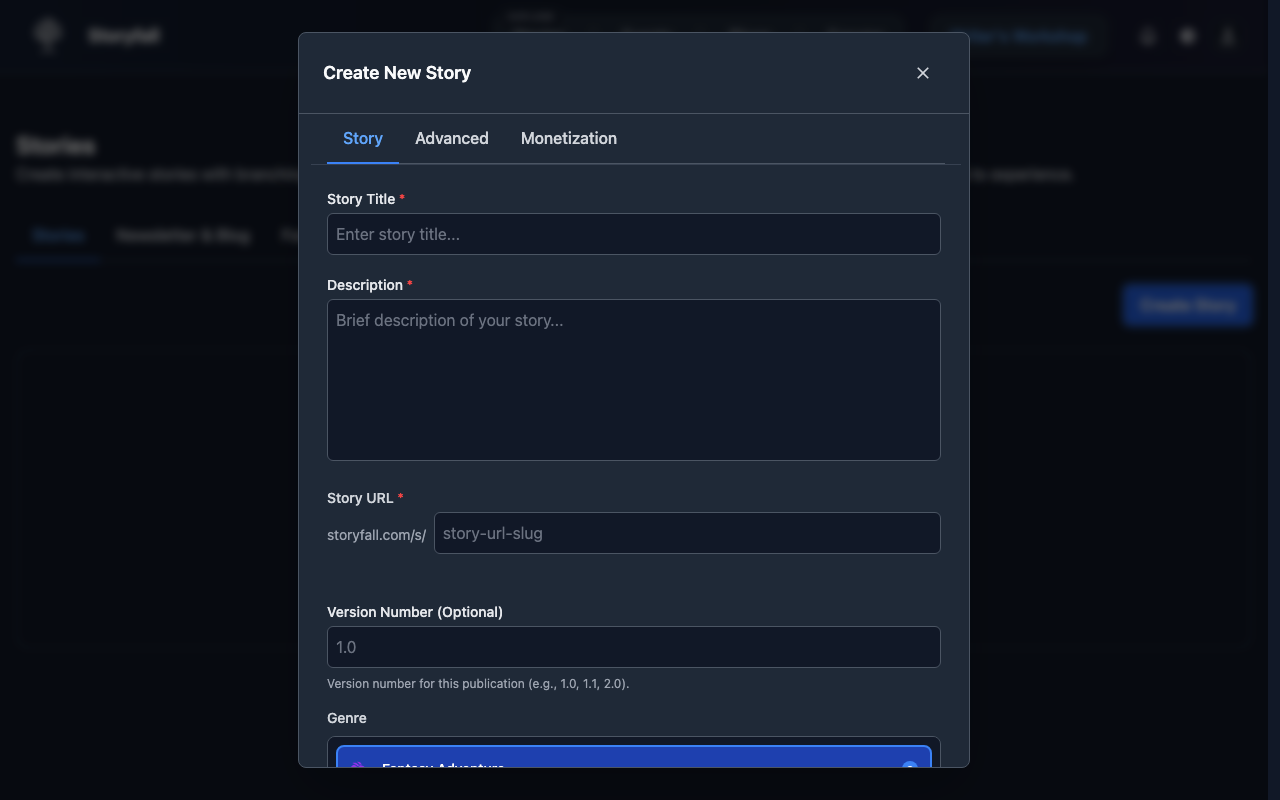
- Enter your story details:
- Title: The name of your story.
- Description: A brief summary that will appear on your story page.
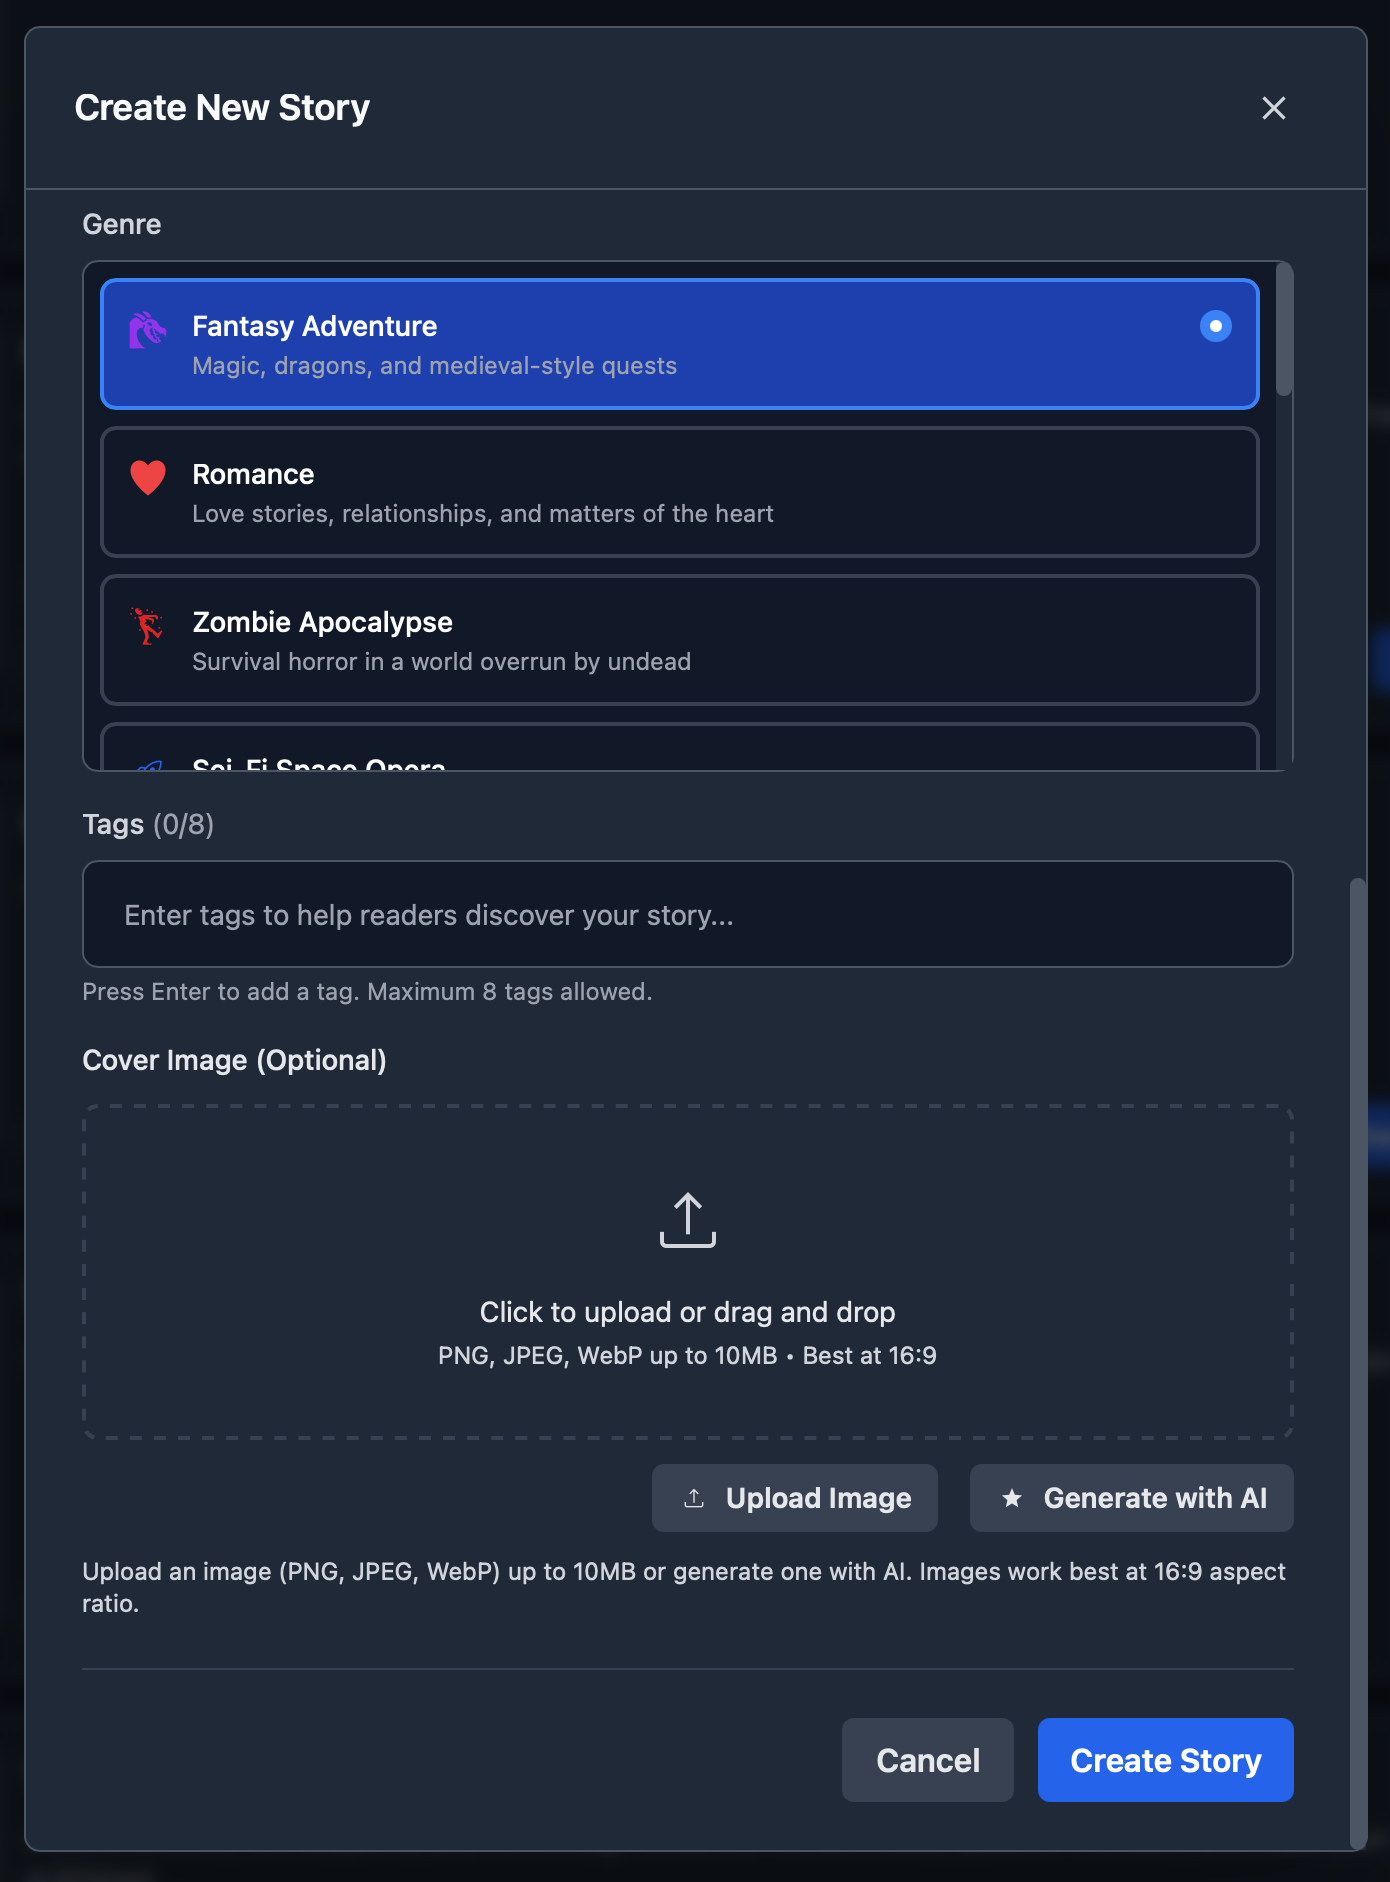
- Genre: Pick a genre (Fantasy, Horror, Sci-Fi, Romance, Mystery, etc.). This helps readers find your story when browsing.
- Language: Select the language your story is written in. This defaults to English and can be changed later in Story Settings. See Languages & Translations for more.
- Cover Image (optional): Upload an image, generate one with AI, or use the Build Cover tool to create a custom cover with your title text over a solid color or uploaded background image. Once saved, your builder settings are preserved so you can reopen and adjust later.
- Click “Create Story”.
Editor Tutorial
When you open the editor for the first time, a guided tutorial will offer to walk you through the key features: the scene editor, creating choices, the story tree, variables, and previewing your draft. You can take the tour to get oriented or skip it and refer to these docs instead.
Most editor panels also have a small question mark icon that opens a more focused tutorial for that specific feature. These are a quick way to learn how individual panels work without leaving the editor.
Step 3: Understanding Story Structure
Your story is organized into:
Chapters
Chapters are the main divisions of your story. Think of them like chapters in a book - they help organize your narrative into manageable sections. Chapters also let you publish incrementally (release chapter 1 while still working on chapter 2) and set per-chapter pricing for paid stories.
Scenes
Scenes are the individual pages within chapters where the actual story happens. Each scene can contain:
- Rich text content.
- Choices for the reader.
- Variables and conditions.
- Effects that modify the story state.
Step 4: Write Your First Scene
Every new story starts with a default first scene. To edit it:

- Use the rich text editor to write your opening.
- Format your text with bold, italics, and other styling options.
- Add variables and conditions as needed (we’ll cover this later).
Example Opening
You wake up in an unfamiliar room. Sunlight streams through
a window, casting long shadows across the stone floor.
The last thing you remember is...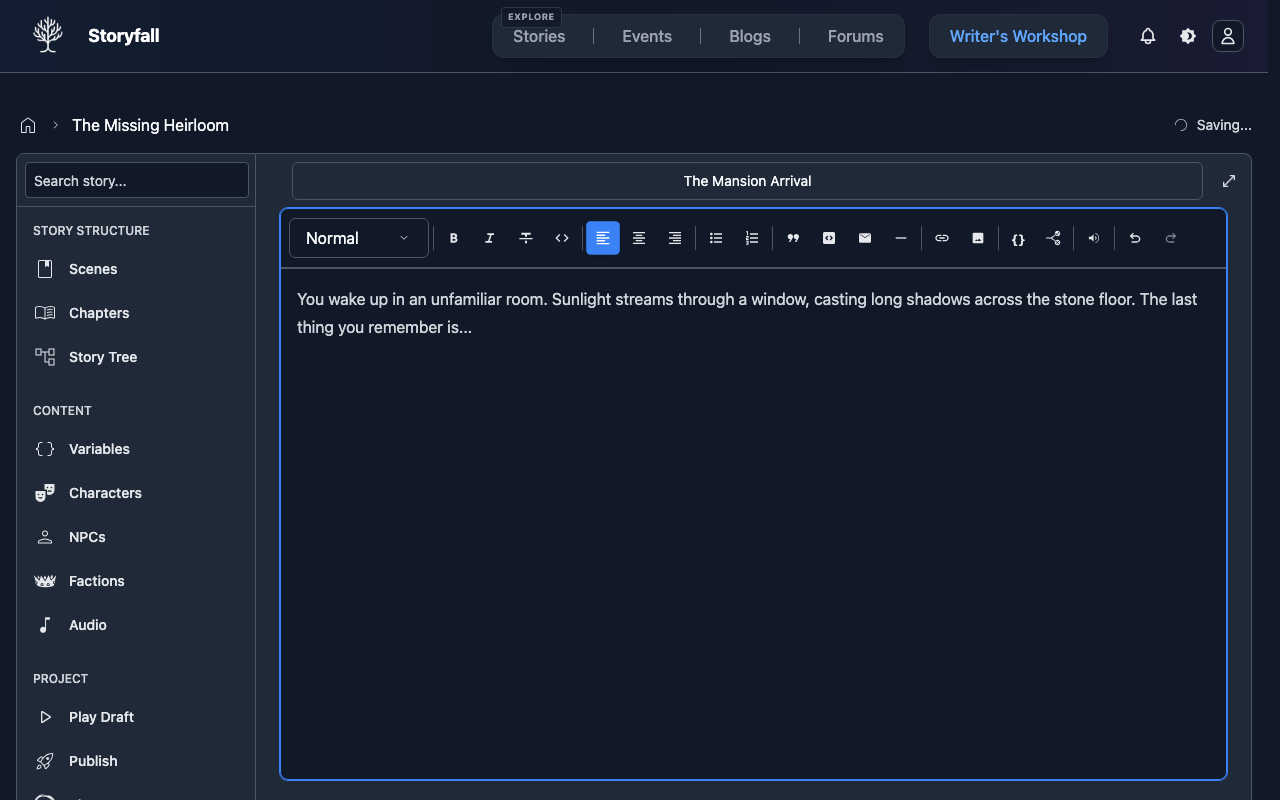
Step 5: Add Choices
Choices let readers interact with your story:
- In the Choices section below the editor, start typing your choice text (e.g. “Investigate the room.”).
- Hit enter or click the arrow button to create or select the destination scene.
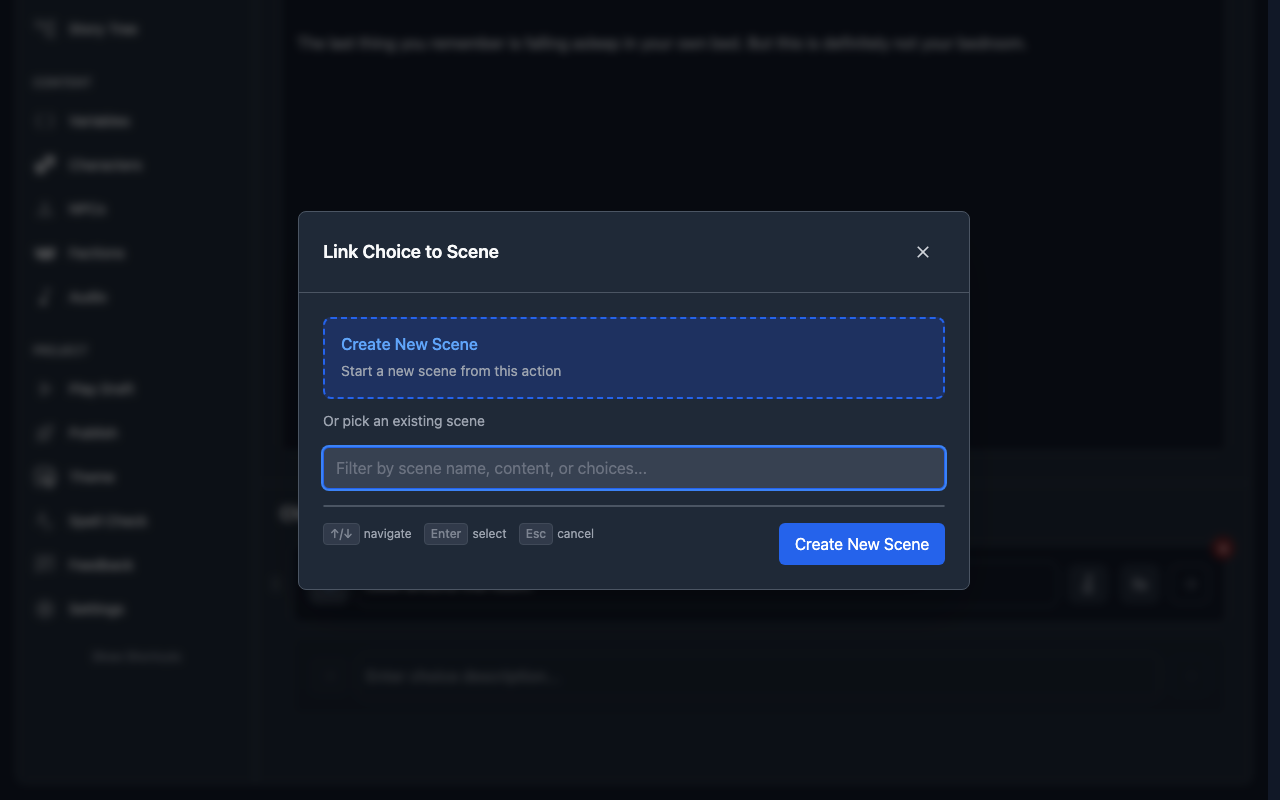
- Add conditions or effects if needed.
Example Choices
- “Look around the room.” → leads to Scene 2.
- “Call out for help.” → leads to Scene 3.
- “Go back to sleep.” → leads to Scene 4.
Step 6: Preview Your Story
Before publishing, test your story:
- Click “Play Draft” in the sidebar.
- Play through your story as a reader would.
- Test all choice paths.
- Verify that variables and conditions work correctly.
Step 7: Publish Your Story
When you’re ready to share:
- Click “Publish” in your workshop.
- Set a version and add a changelog. This is optional for your first publish but required for updates.
- Click “Start Validation”.
- Click “Publish Story”.
You don’t have to finish your entire story before publishing. You can publish as early access and continue adding chapters over time. Readers can start playing what’s available and pick up new content as you release it.
If you want someone to preview your story before it’s published, invite them to your team as a Reader. They’ll be able to play the draft without it being public.
Next Steps
Now that you’ve created your first story, learn more about:
- Editor - Advanced editing techniques.
- Variables & Conditions - Add dynamic content.
- Characters - Create playable protagonist templates.
- Themes & Styling - Customize your story’s look and feel.
- Audio & Music - Add background music to scenes.
- Publishing Your Story - Share your work with readers.