Audio & Music
Add background music and sound effects to your story.
Overview
Storyfall lets you upload audio files and assign them to individual scenes. When a reader moves between scenes, the background music transitions smoothly. When two scenes share the same background audio, it simply continues playing. Readers can control audio playback through in-game settings.
Your Audio Library
Your audio library is shared across all of your stories. Upload a track once and reuse it in any story you create.
Uploading Audio
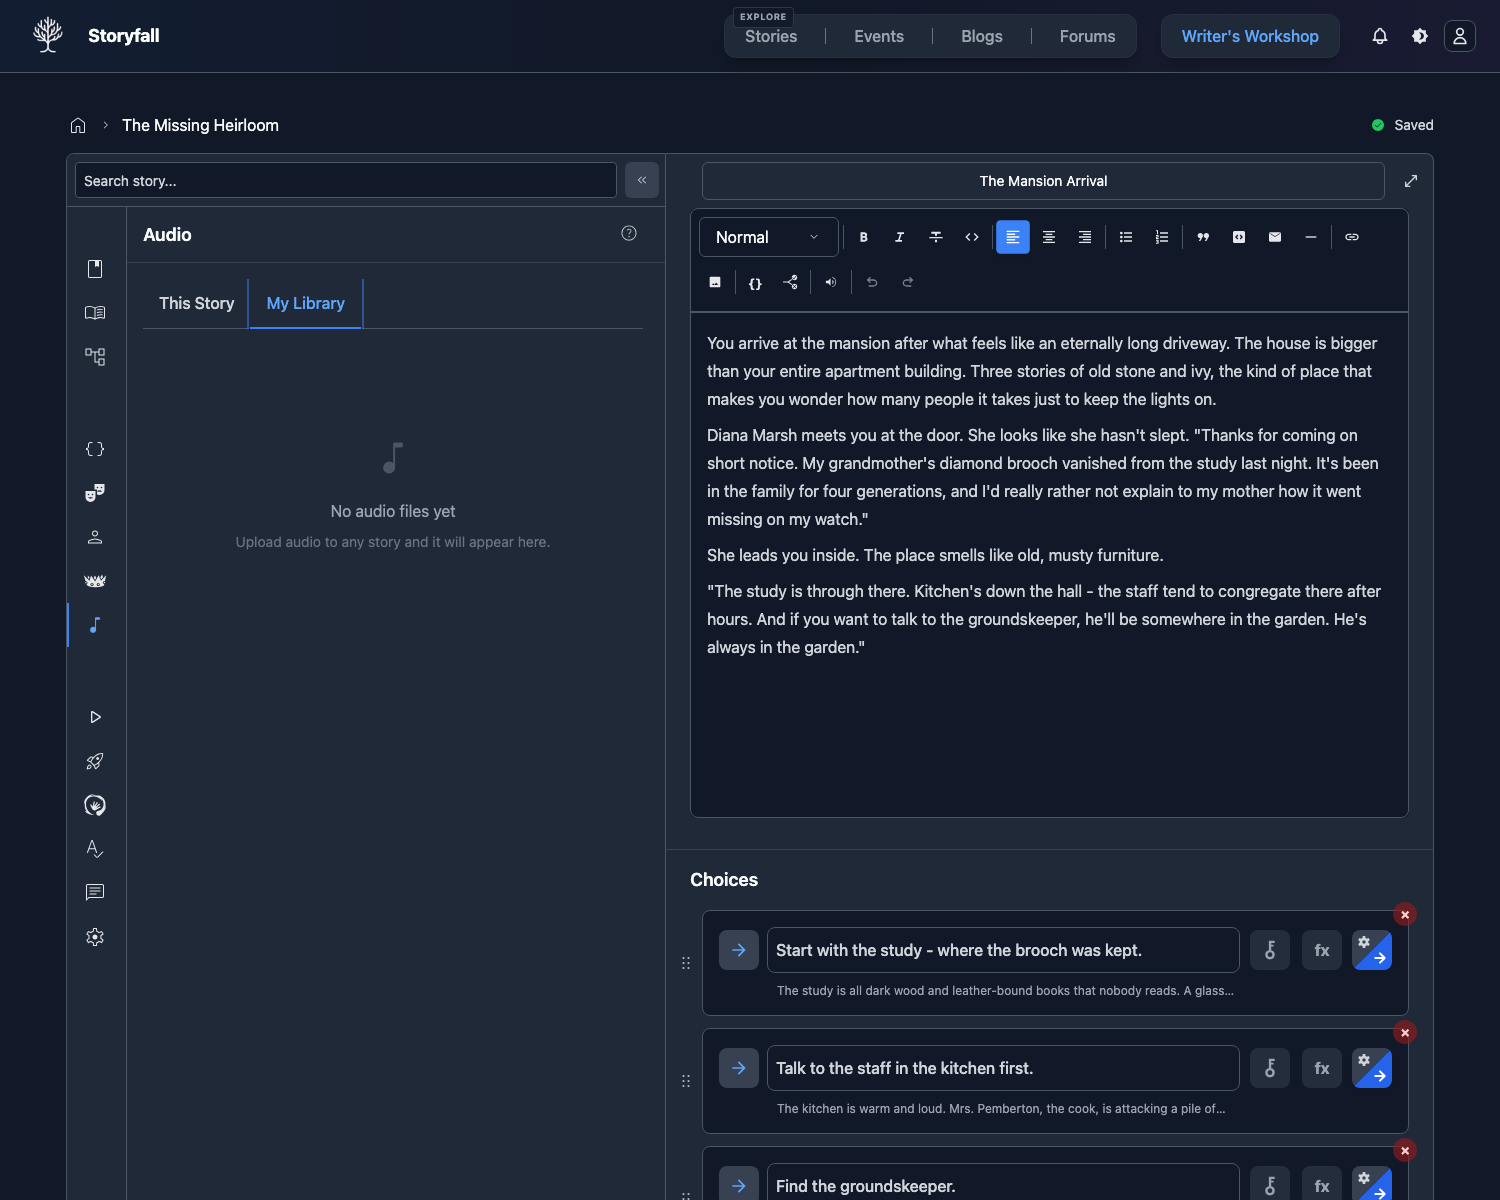
- Open your story in the workshop editor.
- Click the Audio button in the sidebar.
- In the Audio Panel, click Upload.
- Select an MP3 or WAV file (25MB maximum).
- Give your track a descriptive title.
- Pick Background Music or Sound Effect and adjust Fade In / Fade Out if you want custom timing.

MP3 and WAV files are supported. WAV uploads are converted to MP3 for storage and playback. Each source file must be under 25MB.
Managing Your Library
The Audio Panel has two tabs:
This Story - Shows audio files linked to your current story. You can see which tracks are in use and where they are referenced. If you remove a track that is assigned to scenes, embedded in scene or choice text, or used by effects, Storyfall shows the full list and clears those references before removing the track from the story.
Library - Shows all audio files you’ve uploaded across all stories. From here you can import tracks into your current story without re-uploading them.
Fade Controls
Each audio item has a type, volume, fade-in, and fade-out setting. Click Edit on a track to change them with the sliders or exact millisecond fields.
Background music starts with a 1000ms fade in and 1000ms fade out. Sound effects start with no fade. You can set either value from 0ms to 30000ms. Use 0ms when you want a sound to start or stop immediately.
The waveform shows the fade as a ramp at the start or end of the track, so you can see how quickly the sound rises or falls.
These are the default mix settings for that story. You can still override them for a specific sound effect or music cue.
Importing Audio from Other Stories
If you’ve already uploaded audio for another story, you can import it:
- Open the Audio Panel.
- Switch to the Library tab.
- Click Add to story next to any track.
- The track is now available in your current story.
Assigning Audio to Scenes
Individual Scene Assignment
- Select a scene in your editor.
- Open the Audio Panel.
- Use the dropdown to choose an audio track for the selected scene.
- The track will loop in the background when readers reach that scene.
To remove audio from a scene, set the dropdown back to “No audio”.
Bulk Chapter Assignment
You can apply the same audio track to every scene in a chapter at once:
- Open the Audio Panel.
- Select the track you want to apply.
- Click Apply to Chapter.
- All scenes in the current chapter will be set to that track.
This is useful for giving an entire chapter a consistent mood.
Auto-Apply to New Scenes
When you create a new scene, it automatically inherits the audio assignment from the scene you were previously editing. This saves time when building out sections that share the same background music.
Sound Effects
Sound effects can be triggered in two ways. You can insert them directly into scene text by typing @, using the toolbar, or the / command. You can also attach them to choices through choice effects. When a reader reaches that point in the scene or makes that choice, the sound plays.
Each sound effect has its own volume control and fade settings, and you can choose whether it pauses the typewriter effect while the sound plays. Inline sound effects can inherit the Audio Library fade, or you can override the fade for that one cue from the sound-effect bubble menu. The bubble menu also shows a small waveform preview with the cue’s fade ramps.
Background Music Cues
The same @ menu that inserts sound effects can also start background music at a specific point in a scene. In the menu, picked tracks are split into sound effects and music, and music entries are marked with a music note. When you embed a music track, it shows as a music cue in the text.
When a reader reaches the cue, that track becomes the scene’s looping background music and replaces whatever was playing. Use this when you want the music to change partway through a scene without splitting it into separate scenes. If a scene’s music should come entirely from a cue, leave the scene’s background music unset.
A music cue behaves a little differently from a sound effect:
- In a Visual Novel scene, the cue plays when its paragraph (beat) is shown.
- With the typewriter on, the cue starts when the reader reaches it, but it does not pause the text the way a sound effect can.
- With the typewriter off, the cue plays as soon as the scene loads.
Music cues follow the reader’s Background Music setting, not the sound-effects setting, so a reader who has turned background music off will not hear them. Like sound effects, a music cue can inherit the track’s fade settings or use a per-cue fade override.
How Readers Experience Audio
Playback Behavior
When a reader moves to a new scene with different audio, the current track fades out before the new track begins playing. This is a fade-out-then-play transition rather than a simultaneous crossfade, which keeps the audio clean and avoids overlapping tracks.
If the new scene uses the same audio as the previous scene, playback continues uninterrupted.
Audio loops automatically so readers hear continuous background music as long as they’re on a scene.
Reader Controls
Readers can manage audio through the in-game settings:
- Background Music toggle to enable or disable audio playback.
- Volume slider to adjust volume from 0% to 100%.
These settings are saved per playthrough (per character), not globally. A reader can have different audio preferences for different characters or stories.
Per-Track Volume
Each track has its own volume and fade settings that writers can adjust. Use them to balance levels between different uploads and prevent jarring transitions between scenes.
Next Steps
- Themes & Styling - Customize the visual look of your story.
- Editor - Organize your scenes and chapters.
- Publishing Your Story - Share your finished story with readers.